Summary
justETF Scrapper recollects and parses data according to user configurations in order to help them invest or trade in the most suitable assets for their needs.
Additional information
In the beginning of 2024, I developed the first version of this project. Since the world of investing was still quite new to me as I had started investing in 2023. I often got overwhelmed by the big amount of investing possibilities and assets to buy from. At the time, I was using justETF, the website which this project scraps data from. However, the website had many shortcomings and limitations. That is how I decided that I needed to simplify and automate the whole process and created justETF Scrapper. Whose ultimate goal is to reduce the number of investing options to choose from based on the needs and preferences of the user.
In the beginning of 2025, I reviewed and reassessed this project once again. That is when I do my yearly investing summary, where I check the overall performance of my portfolio and the individual performance of each asset while looking for potential new investment opportunities. The project at the time was broken because justETF had made some important backend changes to their API. I spent the whole month of January 2025 revamping the project and adding many new functionalities to it such as filters. For those interested or curious, there is a detailed changelog in the script itself with all the changes between versions.
Originally, justETF Scrapper was supposed to be kept as just a personal project. Although, because I am pretty happy with the current status of the project and its quality. Plus, I have not published any new project on my website in a while. I ended up changing my mind and released justETF Scrapper.
Updates for this project (if there are any) are going to be yearly. That is because I only use this project once at the beginning of each year.
Instructions
How to properly setup and use the project is already explained within the code script itself. Nonetheless, here are the overall steps on what you need to do:
- Download justETF Scrapper
- Download and install Python 3
- Ideally, you should install the latest available version for better performance and security, but this is optional.
- Verify that you can use Python commands from the terminal
- For example, commands like python –version
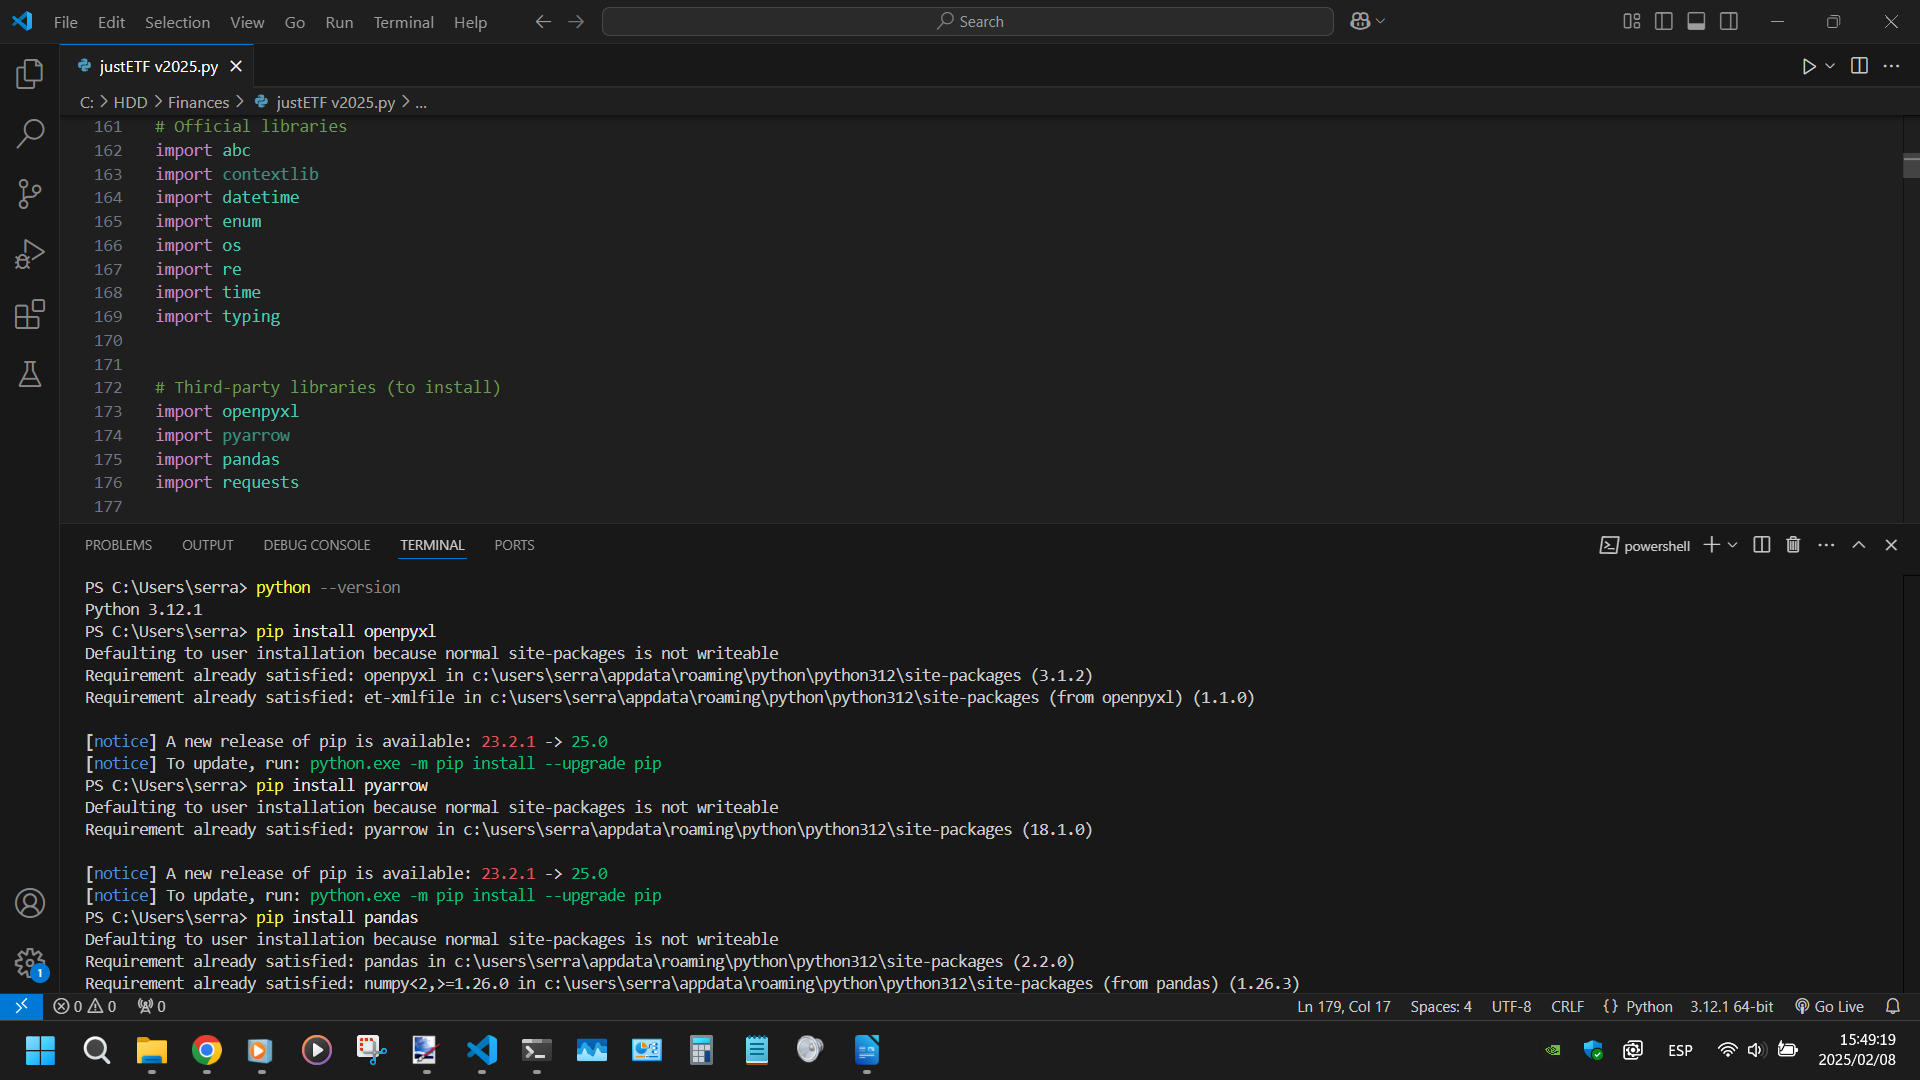
- Install project dependencies
- The list of third-party libraries to install is near the top of the script. Open the script, check out the libraries and run the command pip install <library> for each one of them.
- Execute and run the project’s script
- There are several ways to do that with one of the easiest being, using the command, python <path to script>
- Wait until script finishes
- How long the script is going to take depends on 3 factors:
- Your computer speed
- Your Internet connection speed
- The number of configurations and assets to retrieve and process
- Even with large configurations and number of assets. The script should usually take less than 2 hours to complete.
- How long the script is going to take depends on 3 factors:
- Check generated output files
- The output location is going to be different depending on which version of the project you executed. Although, the output is likely going to be in 2 possible directories:
- The directory where the script is at
- The directory where the terminal was at when you ran the script
- The output location is going to be different depending on which version of the project you executed. Although, the output is likely going to be in 2 possible directories:
Assets
The following download includes all the previous versions of justETF Scrapper. I decided to bundle everything so that you can check the evolution of the project or if you prefer the output result of another version. However, keep in mind that older versions of the project are very likely not going to be operational anymore.
Image gallery
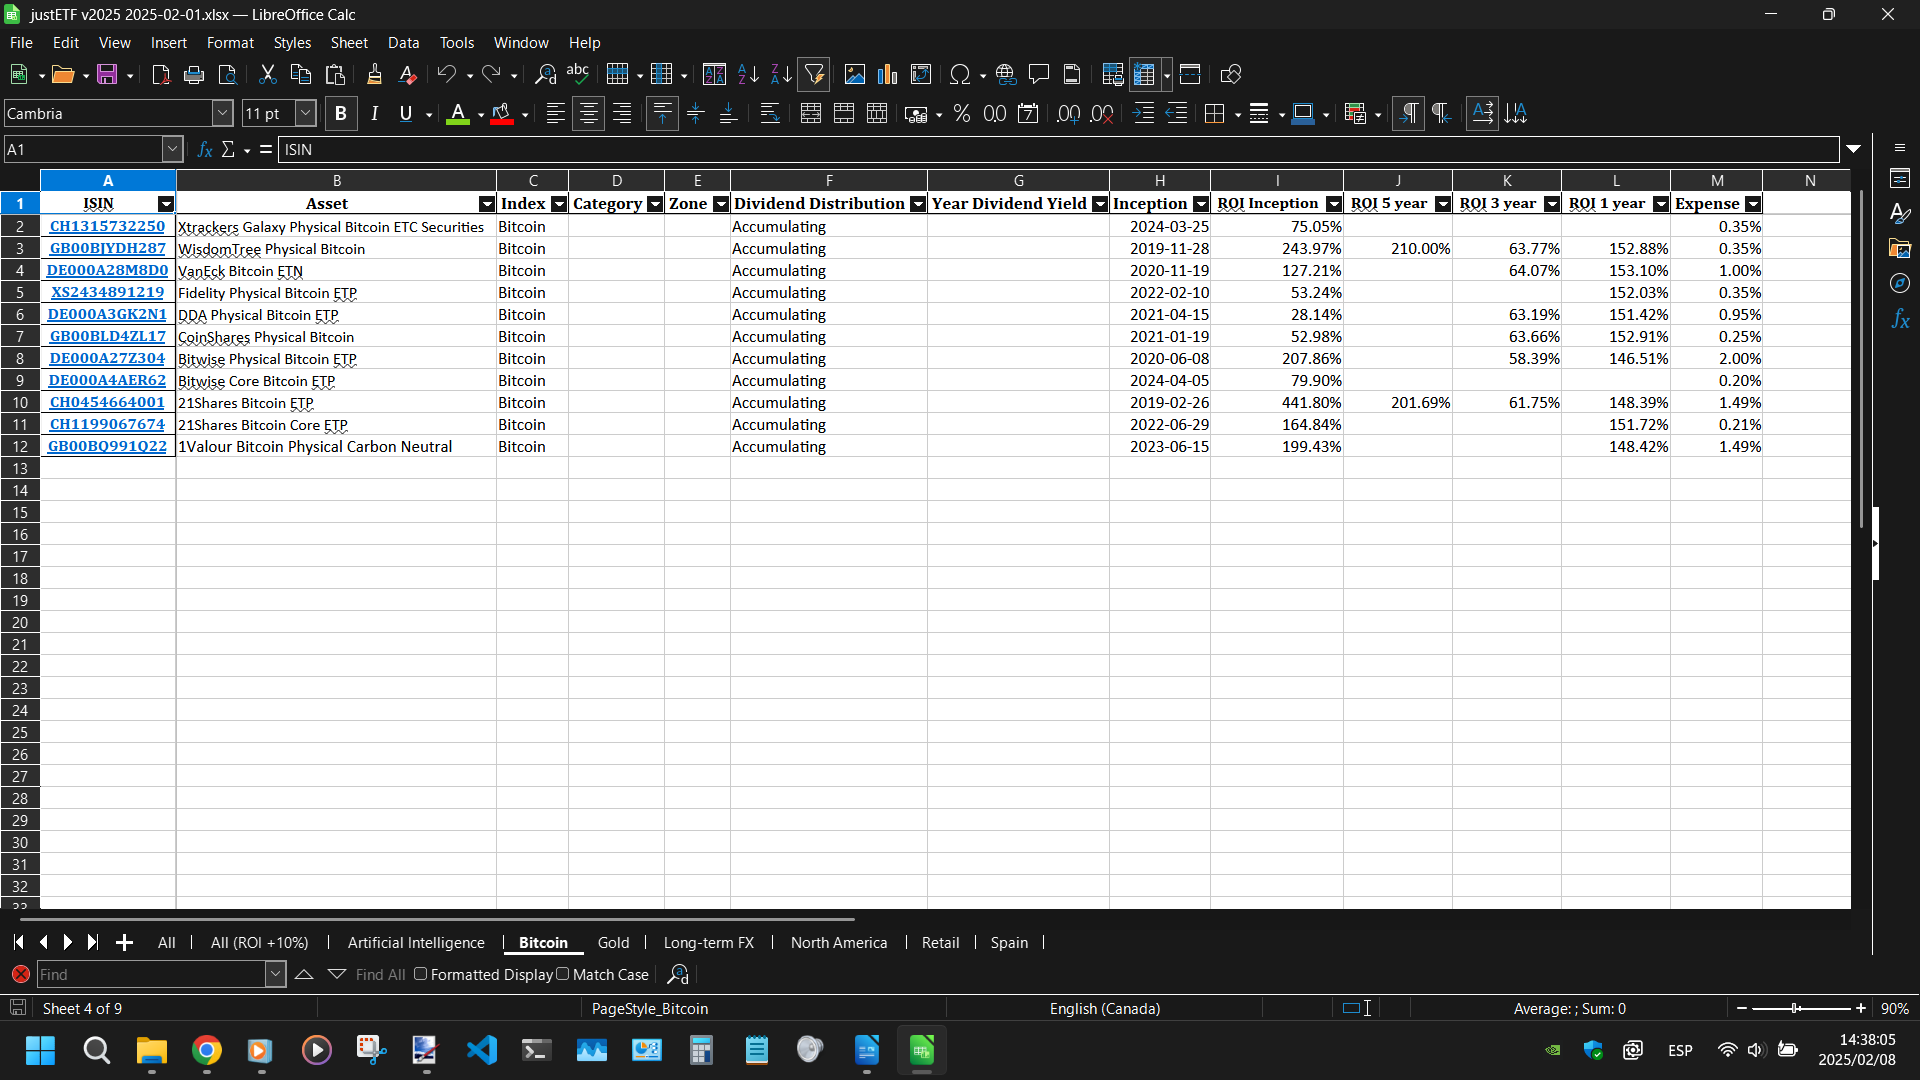
Some images to partially show how to setup justETF Scrapper and what the output looks like.
justETF Scrapper – Installing libraries
justETF Scrapper – Script configuration

justETF Scrapper – Script execution start

justETF Scrapper – Script execution end

justETF Scrapper – All sheet result

justETF Scrapper – Bitcoin sheet result